On this page
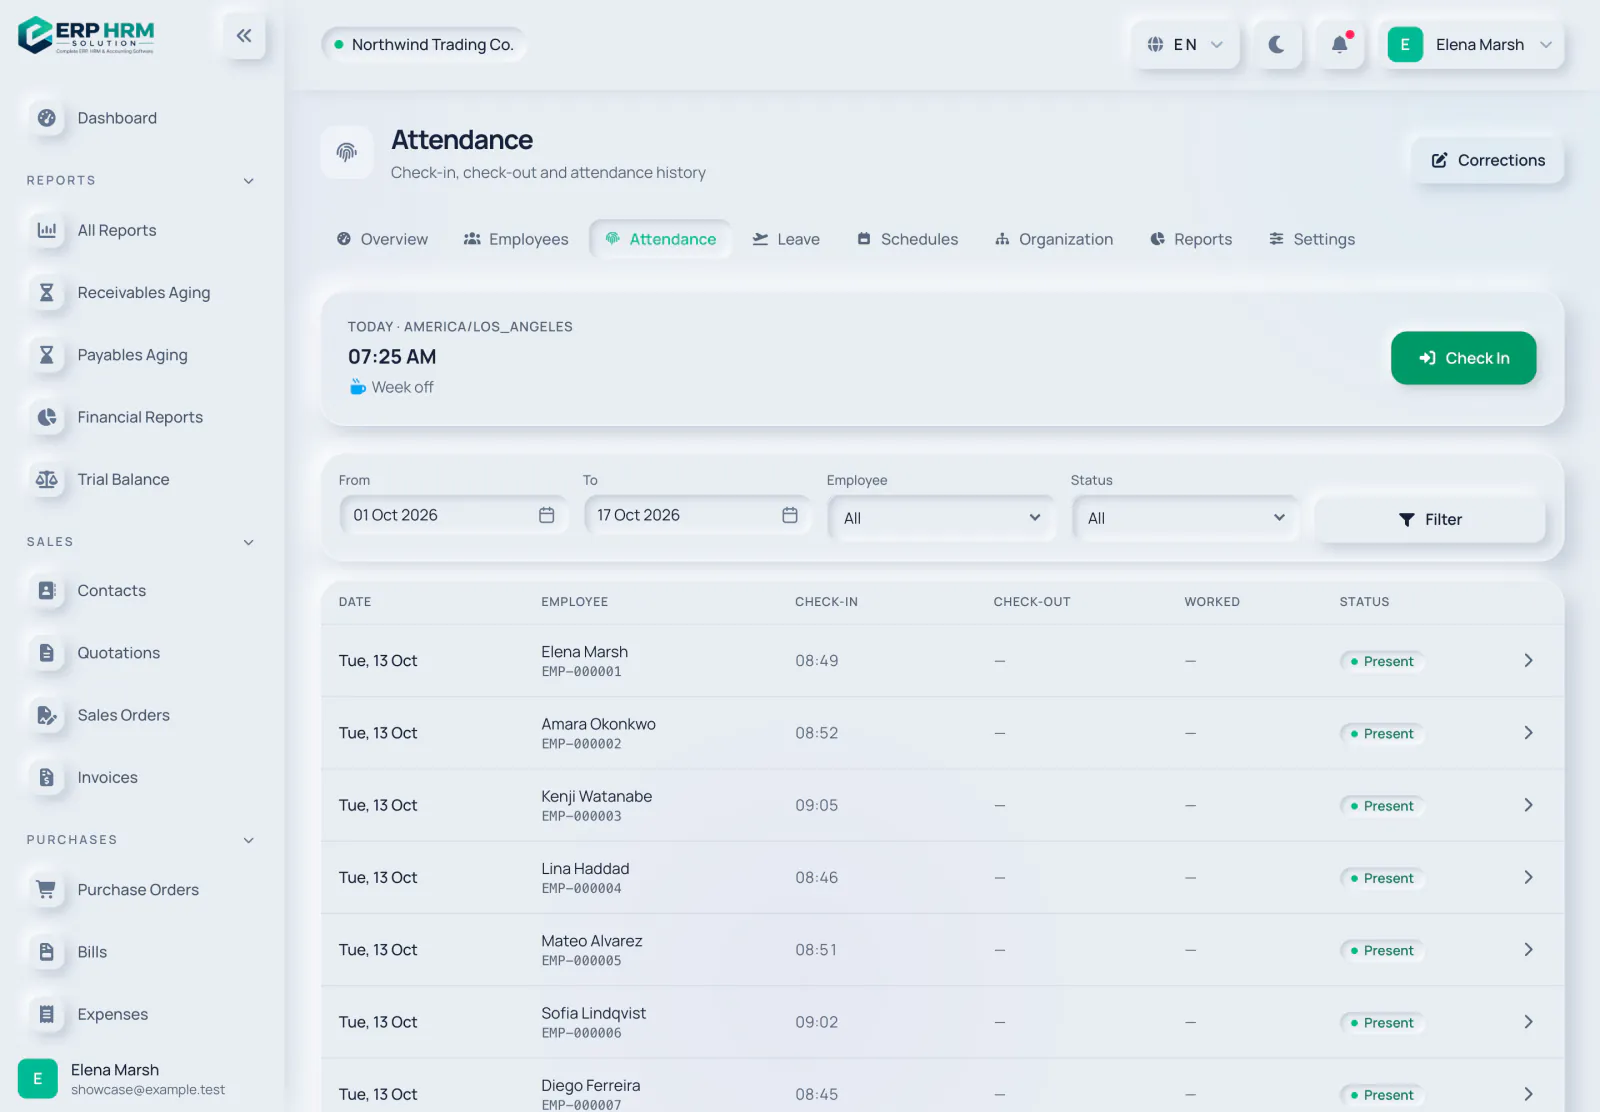
Employees record attendance themselves from HR → Attendance or from the HR overview. The check-in card only appears if your user account is linked to an employee record, and only Active employees can check in.
-
Step 1: Open Attendance
Go to People → Human Resources and click Attendance. The card at the top shows today's date, your timezone, the current time and your scheduled hours (or Flexible hours, Week off or the holiday name).
- 1. Today's schedule
-
Step 2: Check in
Click Check In when you start work. Your check-in time appears next to In.
-
Step 3: Check out
Click Check Out when you finish. An overnight shift can be checked out the next day.
- 1. Check Out
- 2. Check-in time
-
Step 4: Review your history
The table below lists each day with check-in, check-out, hours worked and status. Filter by From, To and Status, then click Filter. Open a row for the full record and its event log.
- 1. Status
- 2. Filter
Attendance statuses
- Present — checked in on time. Late — checked in after the scheduled start plus the late grace.
- Half Day — worked less than the half-day threshold of the scheduled time.
- Missing Check-out — no check-out was recorded in time. Absent — no attendance on a working day. Both are set by a nightly job.
- On Leave, Holiday and Week Off — days that were not working days. Corrected — fixed through an approved correction.
Request a correction
-
Step 1: Open Corrections
Click Corrections at the top of the Attendance page.
- 1. Corrections
-
Step 2: Fill in the request
Under Request a Correction, enter the Date, the correct Check-in and Check-out times, tick "Check-out was on the next day (overnight)" if needed, and give a Reason.
-
Step 3: Submit
Click Submit for Approval. The request appears under Pending.
The primary manager is notified if they can approve corrections; otherwise the HR users who can. They click Approve or Reject on the Pending tab. Nobody can decide their own correction, corrections cannot be requested for future dates, and only one pending request per date is allowed.
Related guides
Ask about the product
Ask what the software can do, how a task works, or which countries and languages it supports. Answers come from these guides.
Thinking…
The AI assistant is not available right now. Search the guides or talk to our team. Contact support
AI can make mistakes. Check the linked guides.
Still need help?
Our support team reads every message and answers in plain language.
Contact support