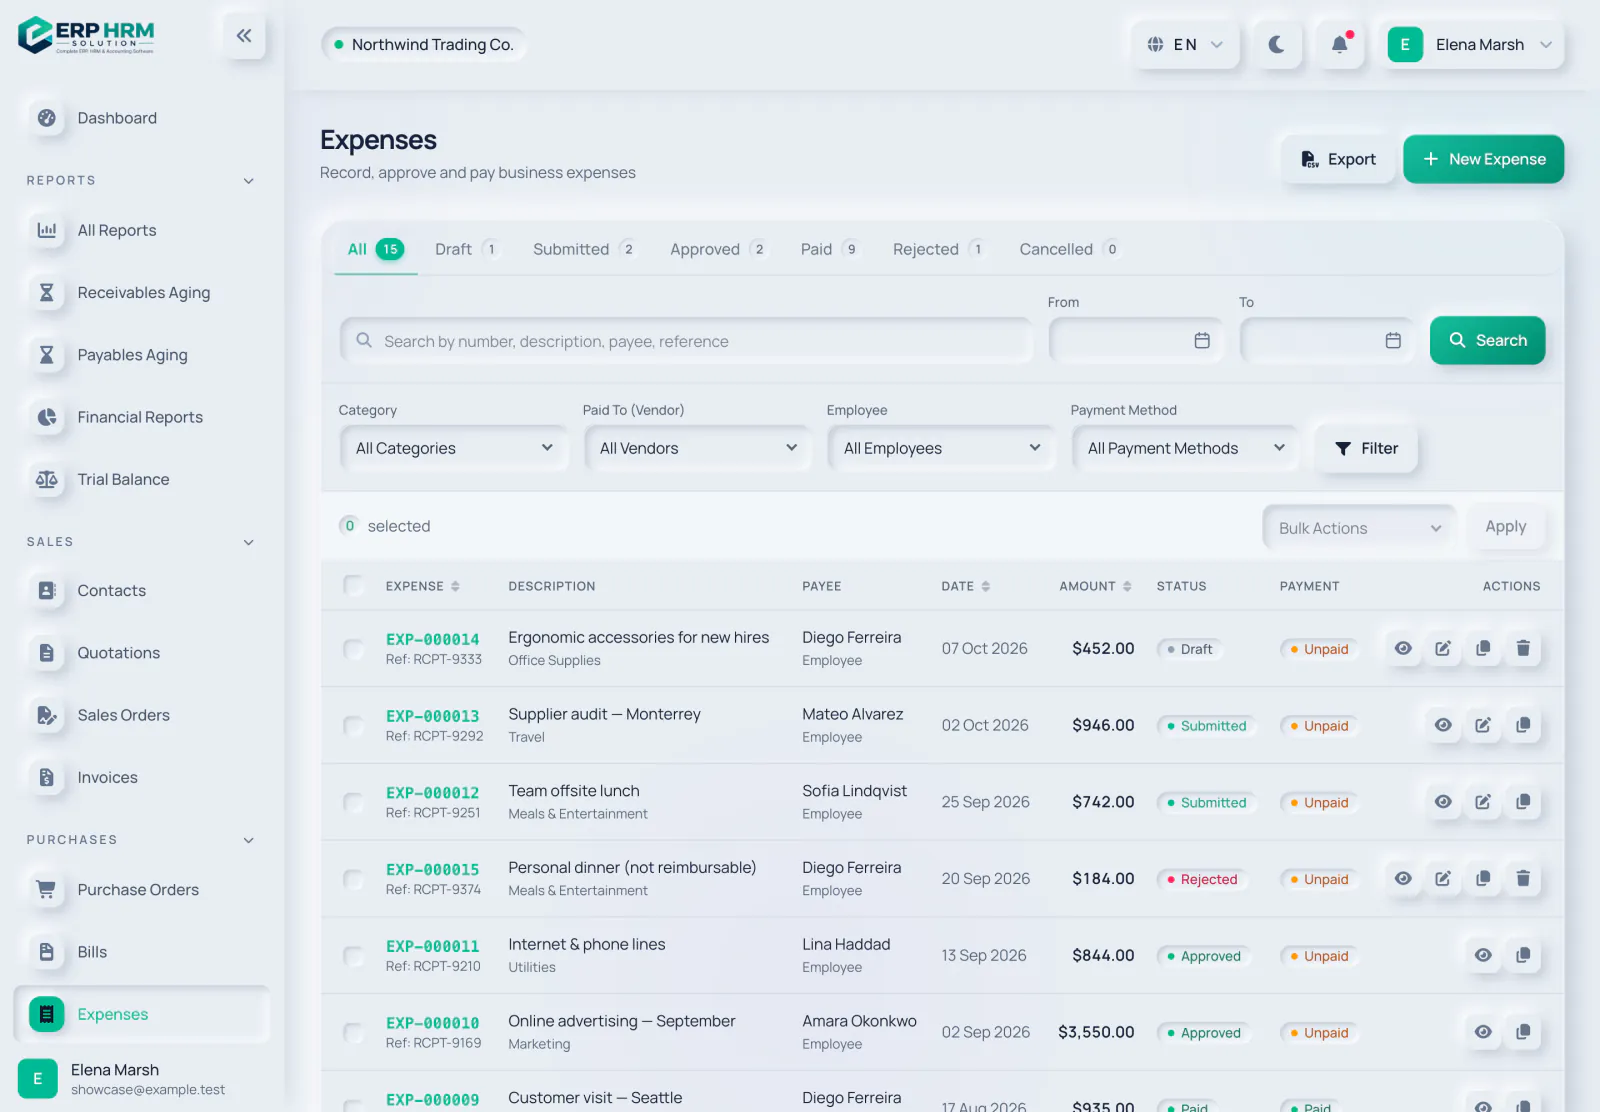
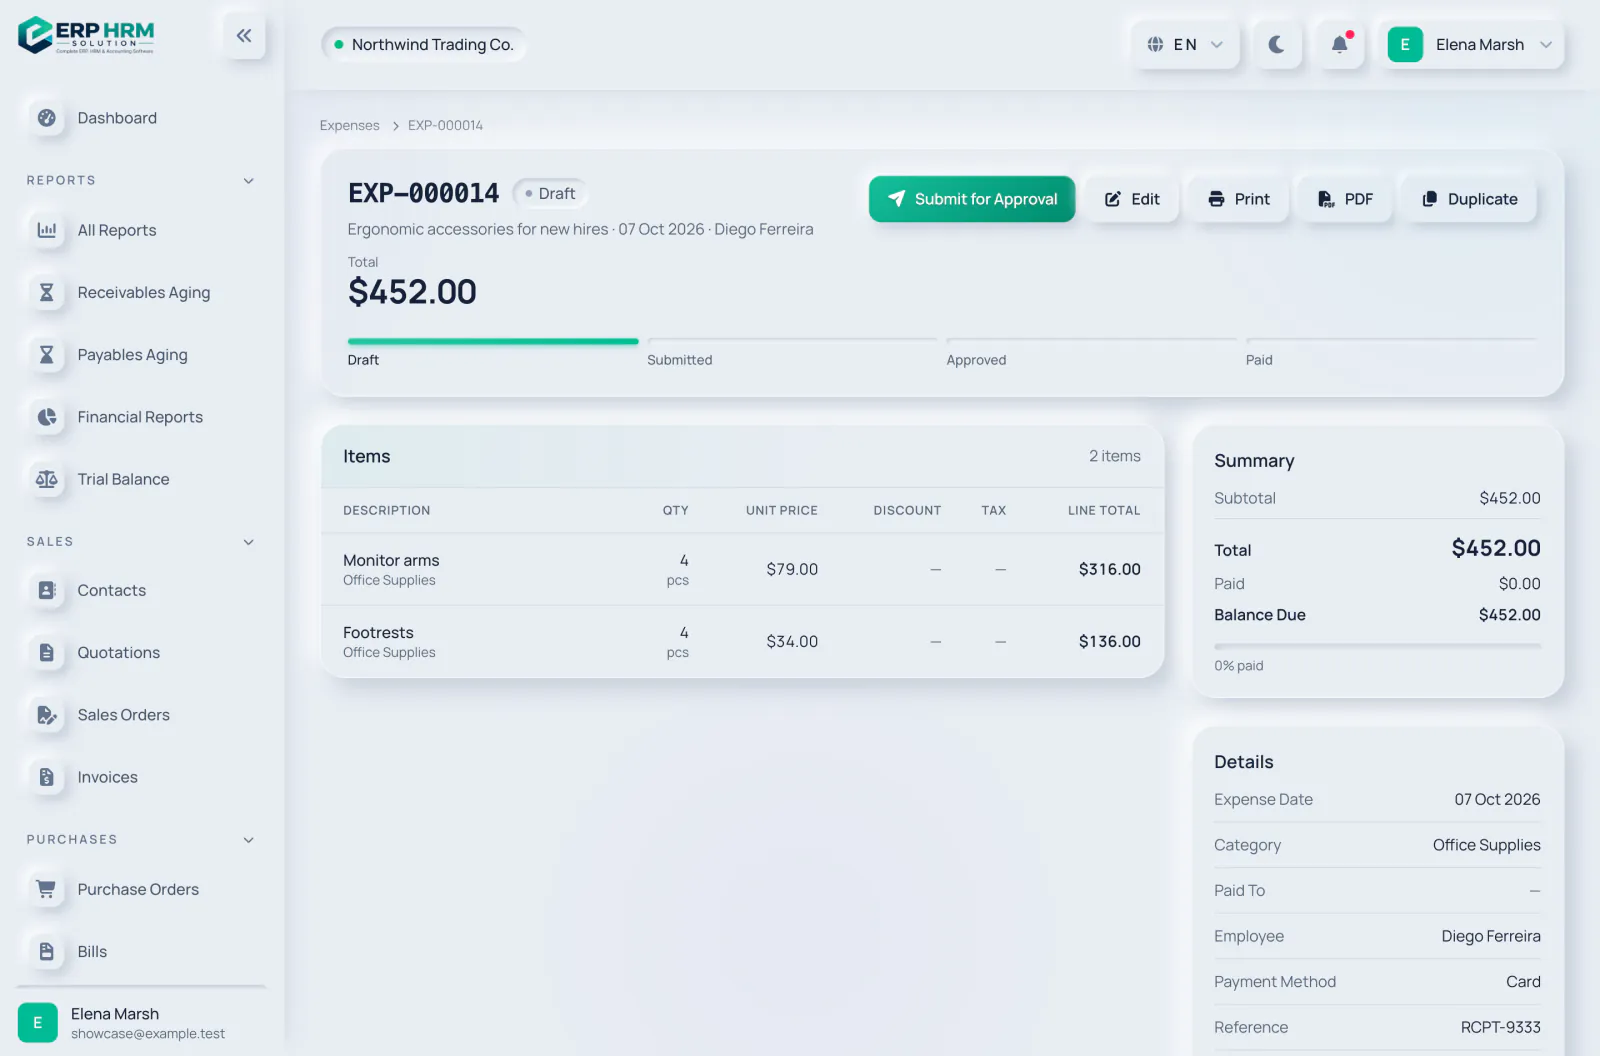
An expense can be a business cost paid to a supplier or a claim filed for an employee. Every expense starts as a Draft, then moves through Submitted, Approved and Paid. The progress bar on the expense page shows where it is.
-
Step 1: Start a new expense
Go to Purchases → Expenses in the sidebar and click New Expense.
- 1. New Expense
-
Step 2: Fill in the expense details
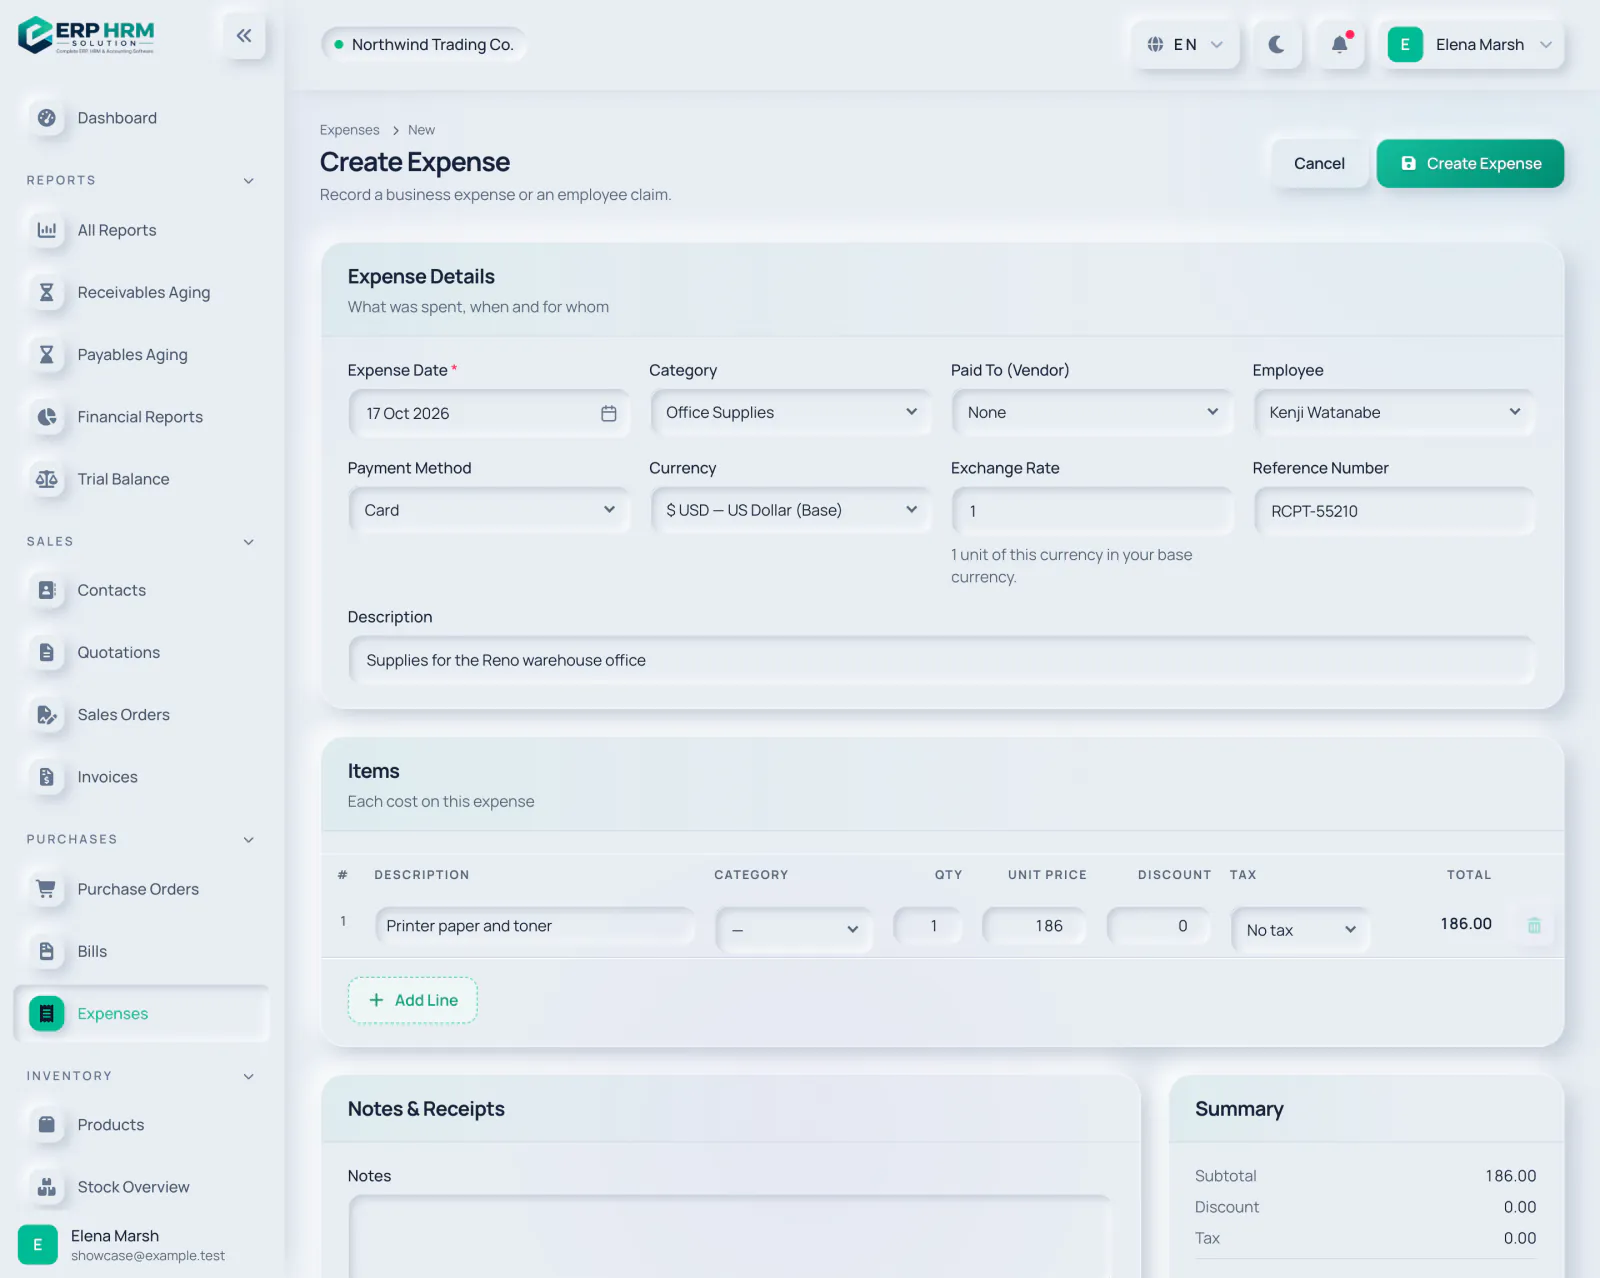
Enter the Expense Date (required) and choose a Category. Pick Paid To (Vendor) when a supplier was paid, or an Employee for an employee claim or reimbursement. Add the Payment Method, a Reference Number such as the receipt number, and a short Description.
- 1. Expense Date
- 2. Category
- 3. Employee
-
Step 3: Check the currency
The Currency defaults to your base currency. For a foreign currency, set the Exchange Rate: one unit of that currency in your base currency.
-
Step 4: Add the cost lines
Each cost is one line with a Description, optional Category, Qty, Unit Price, Discount and Tax. Click Add Line for another cost. At least one line is required.
- 1. Line description
- 2. Add Line
-
Step 5: Attach the receipts
In Notes & Receipts, choose one or more files under Receipts / Attachments: JPG, PNG, WebP, PDF, DOC or XLS, up to 10 MB each.
-
Step 6: Save
Click Create Expense. The expense is saved as a Draft with a number such as EXP-000014.
- 1. Create Expense
-
Step 7: Submit for approval
On the expense page, check the lines and total, then click Submit for Approval. The status changes to Submitted.
- 1. Submit for Approval
- 2. Status
- 3. Progress
Changing an expense
- Edit is available while the expense is Draft, Submitted or Rejected.
- You can add more receipts when editing; files already attached are listed with an Open link.
- Drafts and rejected expenses can be deleted from the Manage panel.
Related guides
Ask about the product
Ask what the software can do, how a task works, or which countries and languages it supports. Answers come from these guides.
Thinking…
The AI assistant is not available right now. Search the guides or talk to our team. Contact support
AI can make mistakes. Check the linked guides.
Still need help?
Our support team reads every message and answers in plain language.
Contact support