On this page
Your company profile holds the details printed on invoices, purchase orders and other documents. You can only see and edit your own company.
Edit the profile
-
Step 1: Open the company page
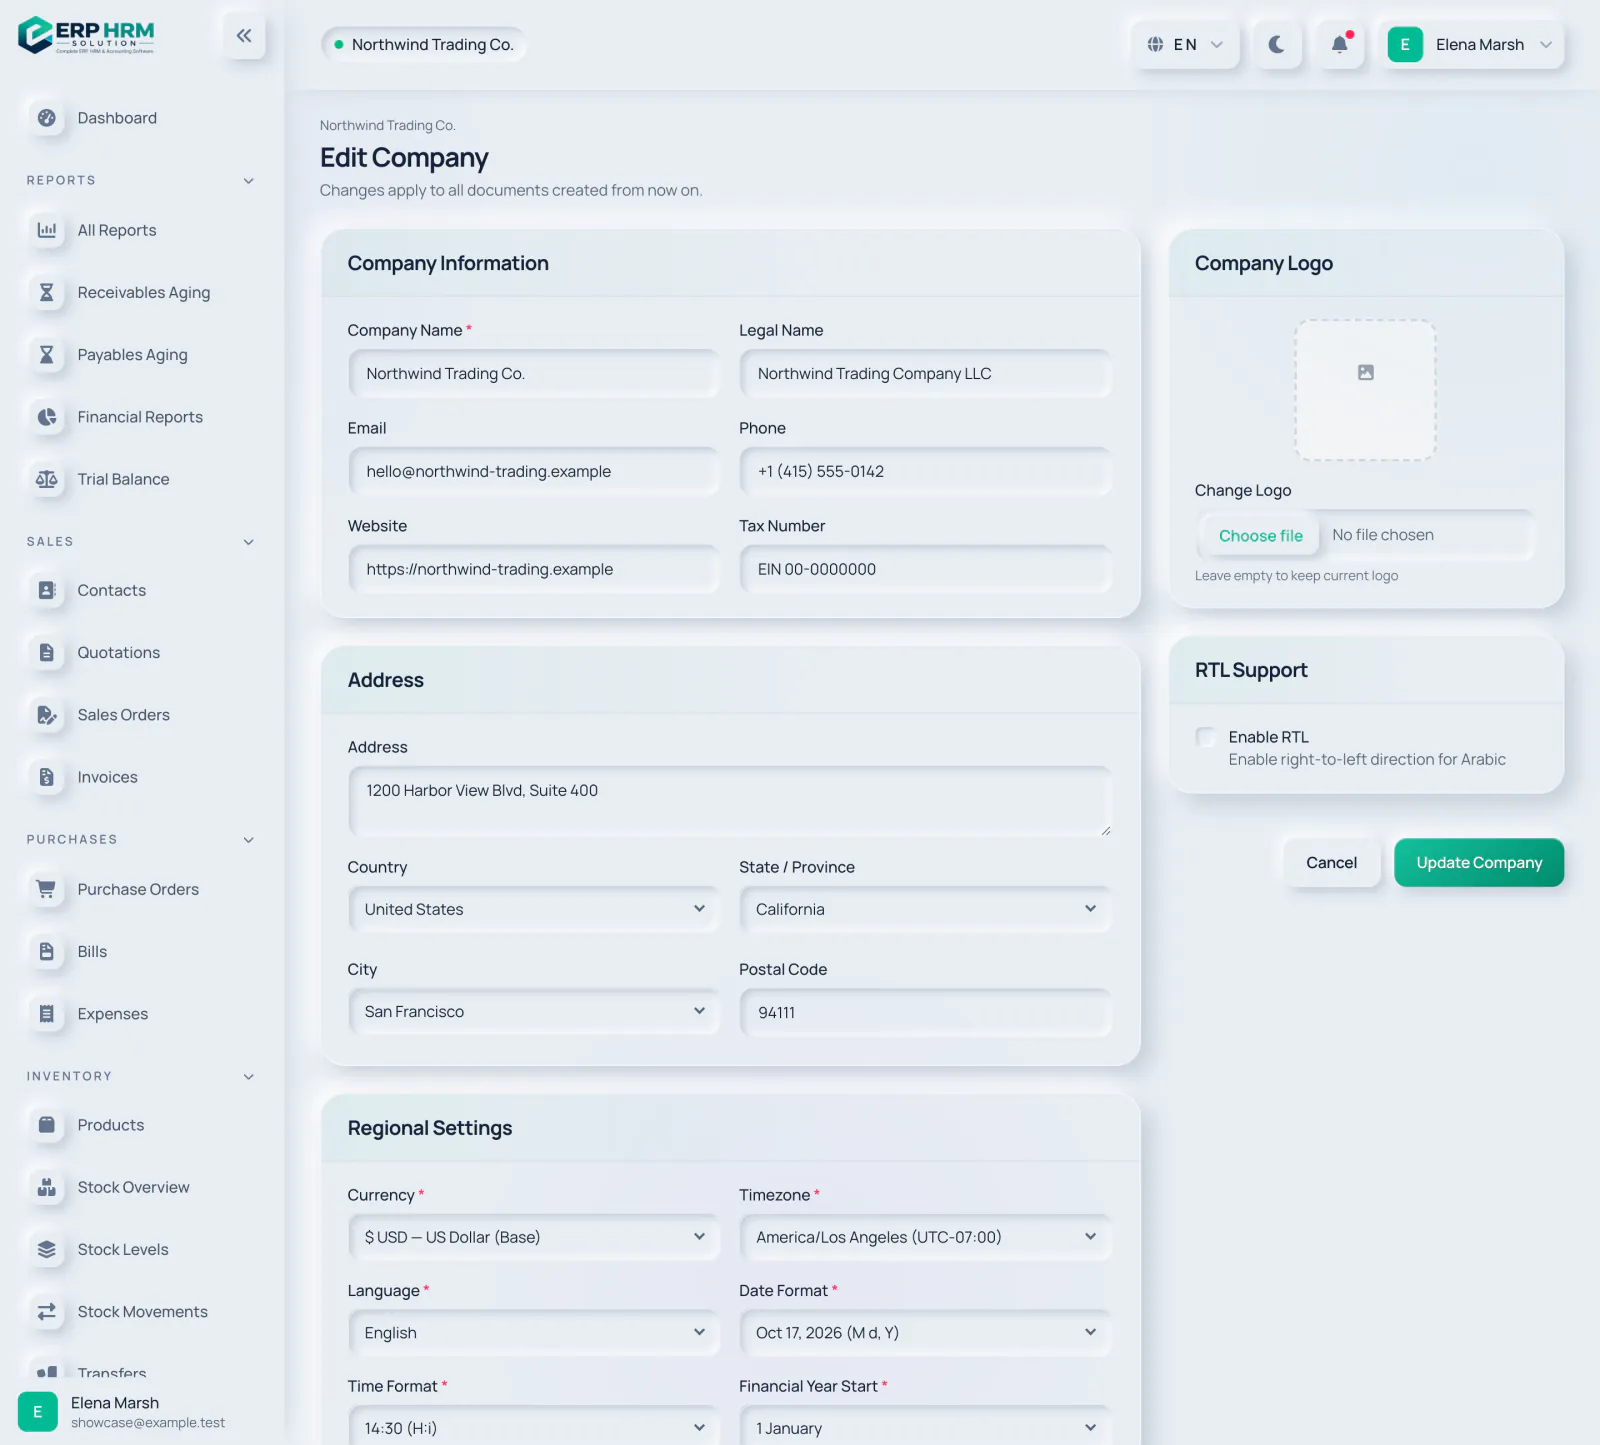
In the sidebar, open Administration → Company, then select Edit. The page is titled Edit Company and reminds you that changes apply to all documents created from now on.
-
Step 2: Fill in the company information
Enter the Company Name (required), the Legal Name if it differs, Email, Phone, Website and Tax Number.
- 1. Company Information
- 2. Tax Number
-
Step 3: Add the address
Type the street address, then pick the Country, State / Province and City and enter the Postal Code.
-
Step 4: Check the regional settings
Under Regional Settings, review the Currency, Timezone, Language, Date Format, Time Format and Financial Year Start.
- 1. Base currency
- 2. Timezone
-
Step 5: Upload your logo
Under Company Logo, choose a JPG, PNG or WebP file. Leave the field empty to keep the current logo.
The setup checklist
The company page also shows a Setup card. It checks that the essentials exist: chart of accounts, an open fiscal period, a base currency, a warehouse, tax rates, units of measure, payment terms and HR departments. When everything is present it says Ready to use. Otherwise it lists how many items are missing and offers Complete setup, which adds only what is missing and never changes anything you already set up.
Support access
Under Platform support access you decide whether the software provider may sign in as one of your users to fix a problem. Select Allow to turn it on and Switch off to turn it off. Every support session needs a reason, lasts at most an hour and is recorded on the same page.
Related guides
Ask about the product
Ask what the software can do, how a task works, or which countries and languages it supports. Answers come from these guides.
Thinking…
The AI assistant is not available right now. Search the guides or talk to our team. Contact support
AI can make mistakes. Check the linked guides.
Still need help?
Our support team reads every message and answers in plain language.
Contact support