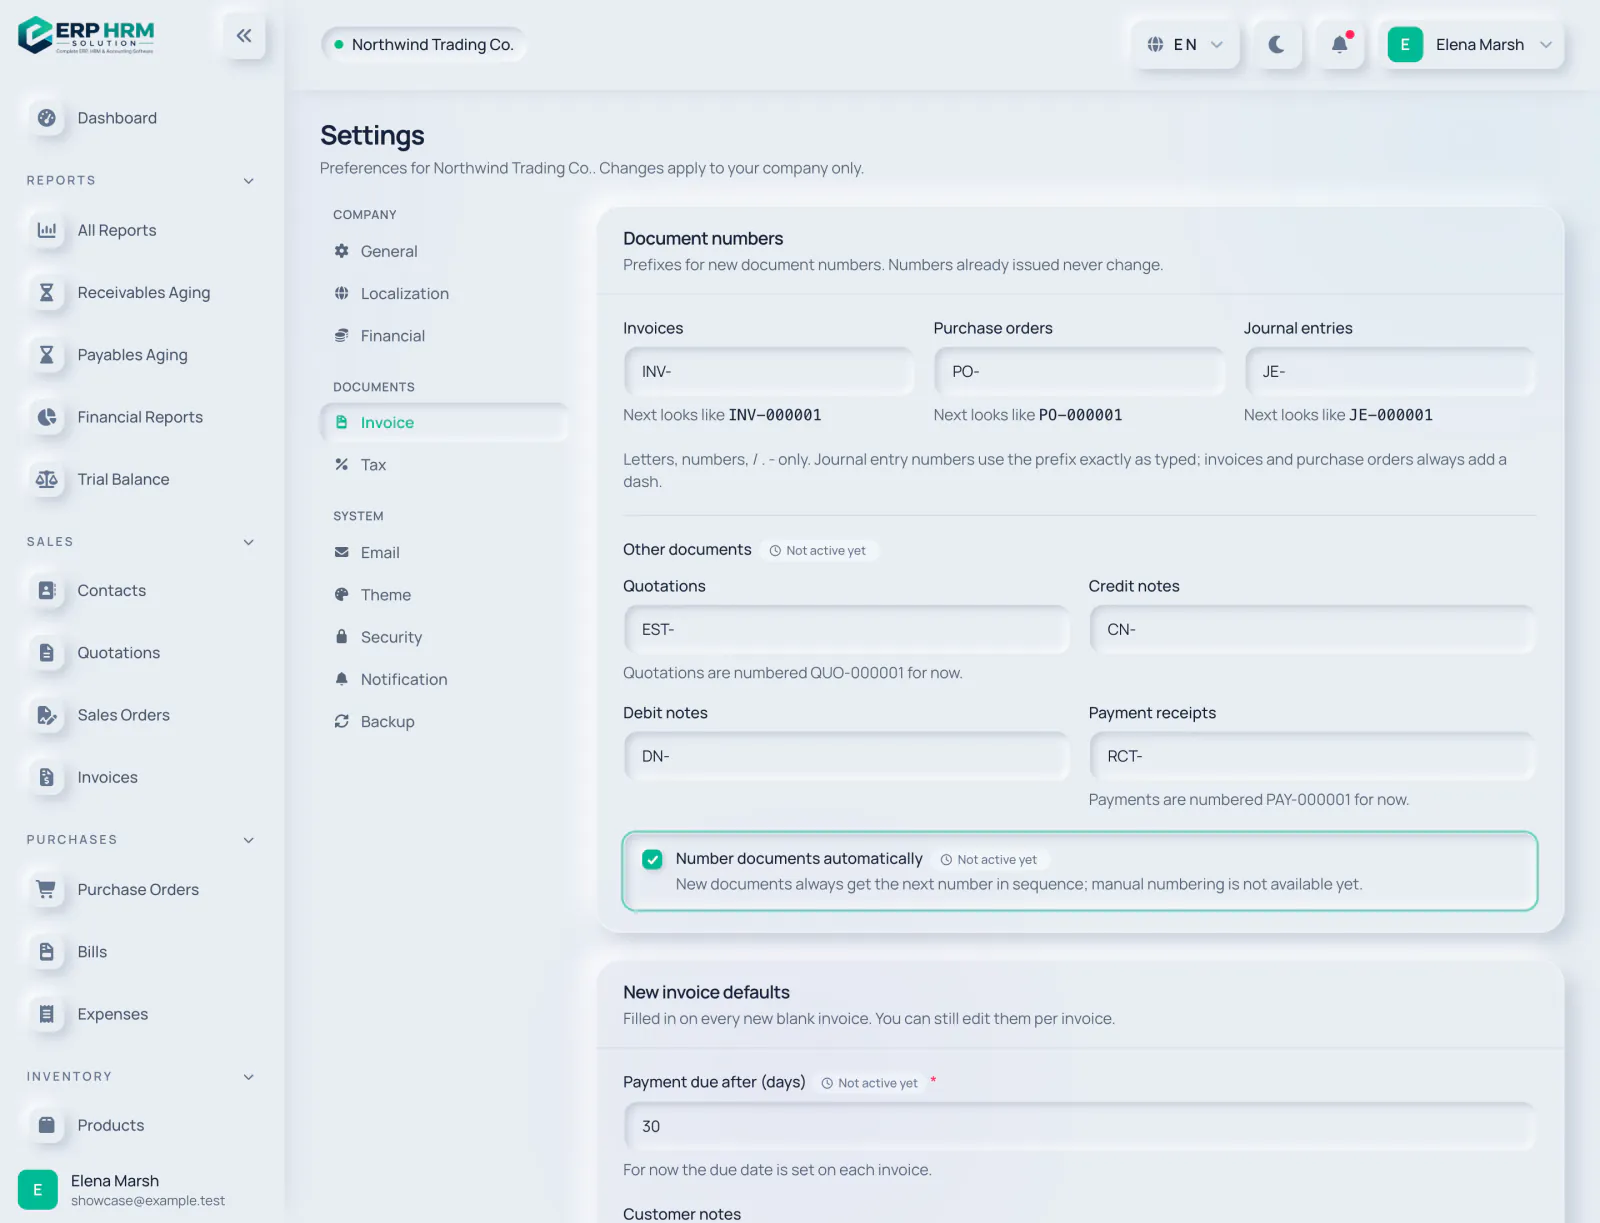
Each new document gets the next number in sequence automatically. You choose the prefix in front of it; the number part is a six-digit counter.
-
Step 1: Open the invoice settings
Open Administration → Settings and choose Invoice under Documents in the settings menu.
- 1. Invoice settings
-
Step 2: Type your prefixes
Under Document numbers, enter the prefixes for Invoices, Purchase orders and Journal entries. Below each field, “Next looks like” shows exactly what the next number will be.
- 1. Invoice prefix
- 2. Purchase order prefix
- 3. Journal entry prefix
-
Step 3: Save
Save the page. The new prefix is used from the next document onwards.
Rules for prefixes
- Use letters, numbers and the characters / . and - only.
- Invoices and purchase orders always add a dash between the prefix and the number, for example INV-000001.
- Journal entries use the prefix exactly as you type it, up to 10 characters.
- Numbers already issued never change when you edit a prefix.
Other invoice settings on this page
- Customer notes and Terms & Conditions are filled in on every new blank invoice; you can still edit them per invoice.
- How to pay is printed on invoices that are not fully paid, for example your bank details.
- Footer is printed at the bottom of invoices. When it is empty, “Thank you for your business.” is printed.
Related guides
Ask about the product
Ask what the software can do, how a task works, or which countries and languages it supports. Answers come from these guides.
Thinking…
The AI assistant is not available right now. Search the guides or talk to our team. Contact support
AI can make mistakes. Check the linked guides.
Still need help?
Our support team reads every message and answers in plain language.
Contact support